


How to Lay Floor Tiles
By Zoe Crook
Nov 11, 2022
How to Lay Floor Tiles
In this step-by-step guide, we will walk you through the rules of how to lay floor tiles. Our floor tiles are a beautiful addition to kitchens, hallways, and bathrooms. Maintaining our collection of handmade tiles is easy. Due to their strong nature and exquisite designs, you'll want to keep them in the best condition forever.

Tiling equipment
In order to lay your own floor tiles, you will need the right equipment for the job.
Tile laying materials:
- Measuring tools (and a notepad to keep your measurements handy!)
- Cleaning and degreasing agent for area preparation
- Floor tile grout
- Grout finishing tool
- Tile adhesive
- Trowel
- A bucket for the adhesive
- Floor tile sealant
- Dust sheets
- Tape measure
- Dry cloth
- Knee pads, protective gloves, and goggles
- Spirit level
- Tile sponge

See Bert & May tile protection and installation equipment. We recommend Mapei products for both grout and adhesive. Mapei Keraflex is an excellent cement-based adhesive. Mapei Ultracolor Plus Grout also offers multiple colour options.

If you don't know how to tile your own floors and are concerned, see our Tile Installation Guide for more specific installation information.
Top Tip: It is important to start laying your tiles from the central part of the room and work into the corners. We also recommend you tile your room in sections, this way you have the freedom to come and go from the area while the tiles are drying in place. Do not walk on tiles before they are fixed and dried.

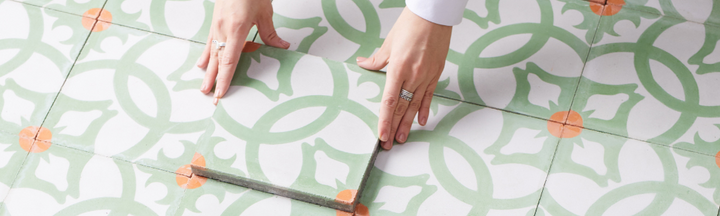
Measure your floor
When laying your own floor tiles, correct measurements are a must. To do so, measure the length and width of your space. Once you have these measurements, add both areas together for the total square meterage of the floor. When ordering your tiles, allow for 10% wastage. This is industry standard as it allows for any misfitting or mismeasurement.

Preparing floor
First things first, you must prepare your flooring to make sure the area is dry, clean, and at an even level. A well-prepared base for your tiles is an absolute must. Degrease and clean the area and let the area dry. Make sure there is no dust, and keep a bucket with soapy water handy.

Laying floor tiles
When it comes to laying your new floor tiles, please check with the tile recommendations before purchasing adhesive. As we have mentioned, Mapei Keraflex is an excellent cement-based adhesive if you are unsure where to purchase from.
The adhesive you use will be dependent on what surface you are laying your floor tiles on. Once you are certain your adhesive is correct, add the recommended about of water to the adhesive powder ratio, mix and lay. Ensure the mixture is lump-free before adding to your floor. Apply the adhesive with a notched trowel for even coverage.

As you firmly press the first tile into the adhesive, twist it to help it bed in. To ensure that all the gaps are uniform, place and press down the neighbouring tiles, separating them with floor tile spacers. Use a spirit level here to monitor that the height of each tile is consistent. Remember to wipe away any adhesive which might creep onto a tile, they could stain if left.
Remember, depending on the size of your space, it is possible you may need to cut down some tiles to fit.

Grouting floor tiles
Wait until the adhesive is dry before grouting or walking on your tiles. This can take up to 48 hours. Once dry, use grouting materials, such as a grout float to work the grout into the spaces between the floor tiles. Once the spaces are filled, use a damp cloth or tile sponge to clean away excess grout. Do this before the grout dries.
Now your grouting is done, you will want it to look as tidy as possible! To do so, use a grout finishing tool to give your grouting that sleek, smooth finish. Dispose of the excess grout.

The finishing touches
Use a clean, soft cloth to polish the tile surface to get rid of any powdery buildup. Grout protection should then be sprayed on. Finally, add a sealant along the edges of your floor. When it comes to this stage, it is important to note that our tiles are porous and will need more sealant than other products. It is helpful here to use masking tape to avoid sealant spilling over onto the tiles. Once this has been done, use a sealant smoothing tool. For more information in greater detail on sealing, read our guide on sealing tiles.

Shop our Sealing Bundle – 5 sqm or less.
Discover our range of handcrafted floor tiles. Please note that we offer a collection of floor tiles in a variety of materials. These include porcelain, marble, and terrazzo tiles. Be sure to check when purchasing your tiles for their best method of installation.
Related Guide – Tile Laying Patterns.